Free miniature tutorials
Chandlier
|
Chandlier
non-working light |
| |
|
|
You will need:
-
black and white clay
-
cutter 2 cm in diameter
-
marble
-
pen
-
liquid clay (optional)
-
wire
-
trace chain
-
super glue |
| |
|
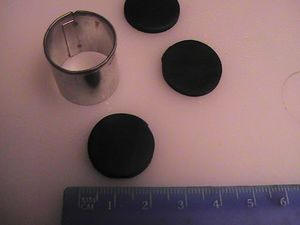 |
Roll black clay into a sheet about 3-4 mm thick.
Use 2 cm cutter to cut 6 circles |
| |
|
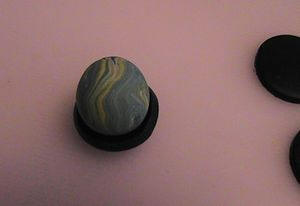 |
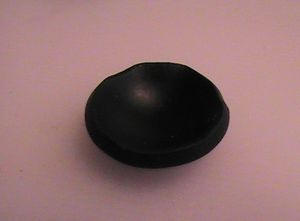
Press the glass marble (or ball of backed clay) into each circle to create a "bowl".
Repeat with all 6 circles. |
 |
| |
|
 |
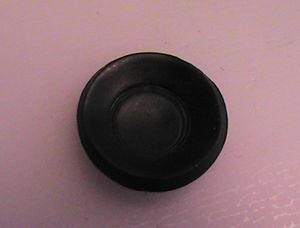
With the end of the pen or pencil mark the circle inside the "bowl". Repeat with all "bowls" |
 |
| |
|
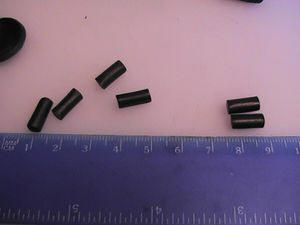 |
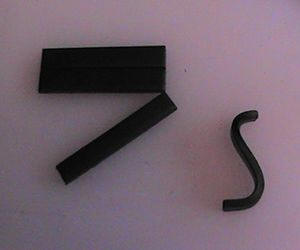
Roll a log of black clay 0.5 cm thick and cut 6 pieces 1 cm long |
| |
|
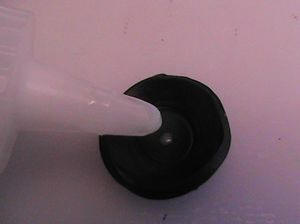 |
Drop a tiny ammount of liquid clay in the centre of the "bowl". |
| |
|
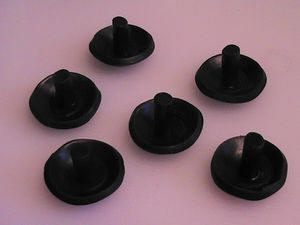 |
Attach logs to the "bowl" |
| |
|
 |
Roll a sheet of black clay (2 mm thick, 3 cm wide and 3 cm long) |
| |
|
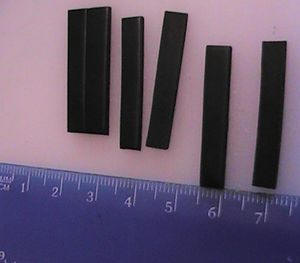 |
Cut 6 stripes from the sheet 0.5 cm wide |
| |
|
|
Bend it as shown |
|
| |
|
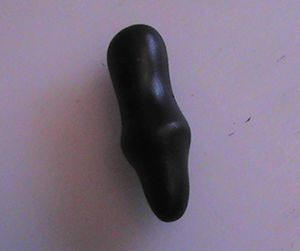 |
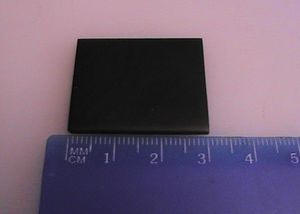
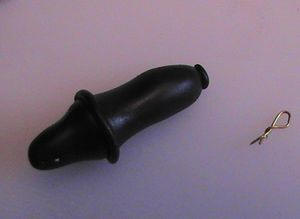
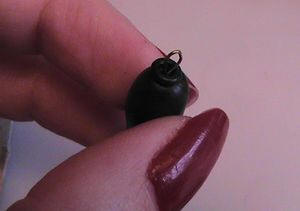
From black clay form a figure for the centre of the chandlier.
Create a loop from wire and insert into the top of the figure. |
 |
 |
| |
|
|
For the candles: roll a log of white clay 0.4 mm thick. Cut into 6 pieces (0.6 mm) and insert a tiny piece of wire on the top. |
| |
|
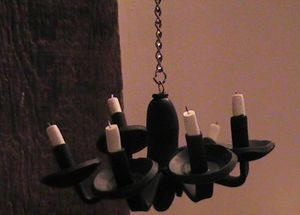 |
Bake all pieces for 15 minutes.
Glue all parts together. Insert trace chain and hang ready made chandlier in your dollshouse. |
| |
|
|
Enjoy! |
|
| Category: Polymer clay | Added by: Marina (2008-04-28)
| Author: Marina
|
| Views: 8375 | Comments: 1
| Rating: 4.3/3 |
| Total comments: 1 | |
|
1
Jackie White
(2011-09-14 3:30 AM)
 0
0

That will be perfect in my miniature Halloween room box. Thank you!!!!!!!!!!!!
|
|
|
|
|
